

How To Install A Radiator In A Pc
Liquid cooling is an efficient style to keep a PC's key processing unit (CPU) cool. Mod all-in-one (AIO) liquid coolers tin can offering better efficiency than air coolers and are like shooting fish in a barrel to install.
Almost h2o cooling kits come up with everything required for the installation, including the radiator tubes and water block. The h2o cake with a cold plate at the bottom sits on the CPU when it'southward installed. It's filled with h2o to absorb the heat generated by the CPU. One time the water has absorbed the rut, it'south pumped through a hose to a radiator, where it's cooled and sent dorsum to the CPU via another hose.
Choosing a water cooling kit for PC
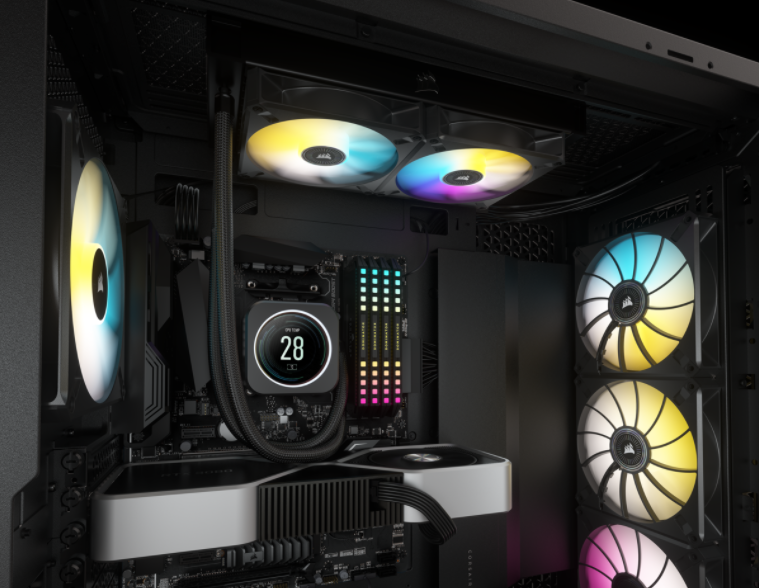
Many reputable brands, like Thermaltake, Libation Master, and NZXT, make liquid cooling kits in various sizes with unlike features. Liquid cooling kits come in sizes between 120 millimeters up to 360 millimeters, with features similar RGB lighting and OLED screens.
Choosing the right water cooling kit depends on many factors. The kit should exist compatible with your PC'southward CPU, and information technology should fit in your PC case. It should also provide acceptable cooling for the system. More often than not, 240-millimeter options, similar the Cooler Master MasterLiquid ML240, fit into almost Standard ATX cases and provide far better cooling than smaller 120-millimeter options, like the Asus ROG RYUO. Larger 360-millimeter AIOs, like the Arctic Liquid Freezer Ii, oft provide the best cooling, simply they accept upward more space and are often more expensive than the smaller options.
Planning the installation
Most PC cases have multiple mounting spots for the radiator. You tin can often mount the radiator on the front, top, or bottom of the case. It'due south best to decide where the radiator will fit beforehand to avoid issues. Once you've decided where to install the radiator, you can mountain the fans onto it using the long screws provided. Mod fans commonly have an arrow or some type of mark to identify the direction of the airflow.
Nearly AIO coolers come with unlike mounting brackets to fit Intel or AMD processors. Each type of bracket is only compatible with one blazon of CPU, and it'southward critical to use the correct bracket to mount the water cake.
The mounting bracket fastens to the CPU using a backplate on the back of the motherboard. Some motherboards will already take a compatible backplate installed, while others will require a new backplate to install the AIO. Most water cooling kits come with an Intel or AMD compatible backplate for piece of cake installation. Many modern cases allow users to supercede the backplate without removing the motherboard. In some instances, users must remove the entire motherboard to install the backplate.
How to ready up a h2o cooling kit for PC
- Switch off the PC, and remove the ability cablevision.
- Open up the side panel.
- On some PCs, information technology's worth removing components that may make it the way of installing the cooler.
- Disconnect the CPU fan, and loosen the clips or screws holding the heatsink in place.
- Remove the heatsink.
- Make clean the sometime thermal paste off of the CPU, and add a new layer.
- Some AIO coolers come with pre-applied thermal paste, then this pace might non exist necessary.
- Spiral the standoff screws for the water block into the backplate via the holes around the CPU on the motherboard.
- Line upwards the water block and mounting subclass with the collision screws.
- Using the provided screws, tighten each screw a half plow while moving in a diagonal orientation until snug. Do not overtighten.
- One time the water block is in place, you can beginning installing the radiator.
- Install the radiator using the provided screws, ensuring the tubes aren't in the way and won't go snagged on other components.
- Position the radiator and then the liquid tin can broadcast continuously. Bottom mounting a radiator with the tubes facing upward is non advisable in most cases.
- Run the fan cables through any available cable direction slots or secure them with cable ties to prevent harm.
- Connect the power and other cables required for the AIO to run.
- Consult your motherboard'southward manual to locate the required headers.
- In that location should be a SATA power cable and a 3-pin connector going to the CPU_Fan header on the motherboard. The radiator fans usually piece of work off regular four-pivot connectors. If the h2o cooling kit has RGB lighting, it will likely plug into the RGB headers on the motherboard.
- Double-check that all the cables and hoses are connected securely and that the water block is making contact with the processor.
- Switch on the PC to test that everything works properly.
Afterward installing the water cooling kit, it'southward advisable to tune its performance using software. Most AIOs come with software for users to conform the lighting and performance while monitoring the PC temperature.
Users can decide whether to optimize their AIO for performance, quieter functioning, or a balance of both. Since almost software gives real-time temperature and fan readings, users tin adjust the fan speeds up and downwardly depending on their system performance. Some software also allows custom alerts when components accomplish a certain temperature. Users tin specify what actions should have identify such as adjusting the fan speed or shutting down the PC.

Source: https://dotesports.com/hardware/news/how-to-set-up-a-water-cooling-kit-for-pc
Posted by: dicksoncovere1965.blogspot.com
0 Response to "How To Install A Radiator In A Pc"
Post a Comment